MENU of the iTripcomputer H-100 Metrometer
Metrometer H-100 | Specifications
Operation – basics | Operation during a rally
Connection | Configuration | Calibration | Operating modes | Azimuth mode operation
Technical data | FAQs | Movies
Tripmeter calibration
Tripmeter calibration is the process of adapting the device to the speed sensors installed in the vehicle.
Hint. If you only use the GPS signal without speed sensors – skip this section. If you have a sensor, read to the end.
The tripmeter, like other measuring devices, requires calibration. Calibration is intended to “teach” the tripmeter to correctly read information from the car. Information from speed sensors changes depending on where the speed sensor is installed after the change:
- tires
- tire pressure
- gear ratios, etc
When calibrating a tripmeter, known reference distances are most often used, which are measured using another, reliable measurement source. For example, a road section prepared for the legalization of taximeters, posts standing on national roads marking the distance traveled. The end result of correctly performed calibration is measuring the distance with a tripmeter and obtaining the same value as the reference distance.
Calibrations can also be performed in other ways or even calculated. It depends on the place and method of mounting the sensor.
Remember that the calibration value in the tripmeter is always referred to 1 km. Remember that the calibration value in the tripmeter is always referred to 1 km.
Remember that if you have two speed sensors installed in your car and you use them simultaneously for measurements, multiply the measured value of the number of pulses by 2. During calibration, the tripmeter counts impulses from only one wheel.
If you use speed sensors to measure, but only want to learn the basics, check out the articles in the “green” menu. If you want to know all the functions, read the entire article.
Tripmeter settings for distance measurement
Before calibration, check the sensor settings and GPS settings. You can do this using chapter |H-100| Configuration.
Calibration menu with MULTIk = ON
Whenever you use Multik mode, all measurements, calibrations, entries and auto-calibration refer to the selected coefficient. Before each of these activities, you will have to select the calibration factor that your subsequent activities will apply to.
Calibration according to known distance
The simplest method of calibrating a tripmeter is to match the ODO distance display to the actual distance travelled of a known length. The length of the section can be any, the longer the section the more accurate the calibration, but the calibration section should not be longer than a few kilometres.
- Press MENU long to bring the tripmeter to the start screen position.
When you see the start screen [ _ _ _ _ ] skip this point - switch the tripmeter to the measurement position by pressing the F button ( ODO and TRIP will be equal to 0 )
- and then drive a road section of known length
- stop at the end of it
- press CAL briefly 2 x, which causes the current calibration factor to flash
- press the arrow buttons and bring the ODO indication to the known distance you have traveled
- press F briefly to accept the change or leave it on the screen and after 6 seconds the change will be accepted.


Calibration value measurement function
In the H-100 tripmeter it is possible to measure calibration values. You can measure over any distance, but enter the calibration value converted for a 1000m stretch of road into the tripmeter ( e.g. if you measure over 100m, multiply the measured value x10 and enter it into the tripmeter).
Place the vehicle at the beginning of the calibration section of known length, then:
- Press MENU long to bring the tripmeter to the start screen position.
When you see the start screen [ _ _ _ _ ] skip this point - long press the MENU button until the main branch of the tripmeter menu appears
- use the arrows to find the Tripmeter Settings screen and press OK
- use the arrows to select the Measurement/auto menu and then press OK
Hint. Adapt this fragment of the instructions to the situation you have on your calibration section. Only you know whether you start calibration when you can stop at the beginning of the section or whether you will start the measurement while driving.
In the upper part of the screen there is a counter of impulses that the tripmeter counts from the sensor. It has the form of text k=0. When you drive and start the measurement, the value of the constant k will change.
- the F button starts the measurement and each time it is pressed, it deletes the measured value, the OK button stops the measurement.
- press the F button to delete the measured value and start the measurement again (e.g. at the beginning of the calibration section)
- naciśnij przycisk OK na końcu odcinka kalibracyjnego
- note the measured value when your calibration section is different from 1 km
- press OK when calibrating over a 1km distance. The measured value will be transferred to 1 calibration factor.
- press OK to confirm saving


Calibration value entry function
If you know the calibration factor, you can enter it into the tripmeter.
Go to Menu >> Tripmeter settings >> Calibration – set + enter. Then:
- use the arrows to place the cursor on the factor you want to add or change
- press the OK button to activate the entry option
- use the arrow buttons to change the digit value
- press OK briefly to move the edit box to the next position
- press the CLR button when you want to delete a value or undo an edit field
- long press OK to save the value, which is confirmed by the value flashing.
When you have Multik multi-factor mode enabled, entering a coefficient does not mean activating it.


Activation of calibration factor – only when MULTIk parameter = ON
Go to Menu >> Tripmeter settings >> Calibration – set + enter. Then:
- use the arrows to place the cursor on the factor you want to activate
- press the RUN button.
The selected ratio will be highlighted in negative. (in the photo above, factor no. 1 is active)
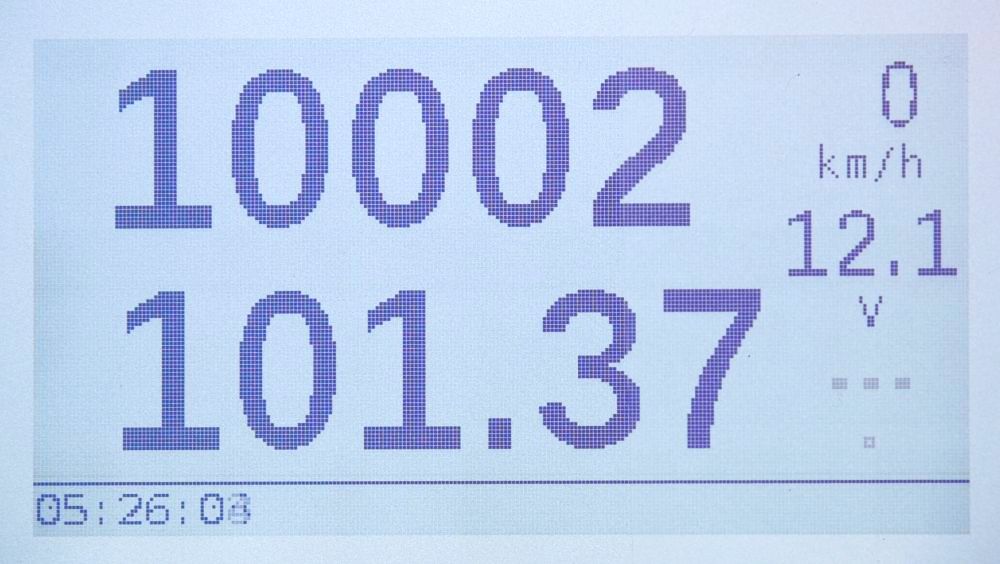
Checking the value of the active factor
To check the value of the active calibration factor:
- set the tripmeter to measurement mode
- press the CAL button briefly
Changing the calibration factor during measurements – only when the MULTIk parameter = ON
If you use MULTIk mode, you can select the calibration factor from the ones saved in the tripmeter’s memory.
- set the tripmeter to measurement mode
- press the CAL button briefly
- browse the calibration coefficients saved in memory with the arrows
- when you find the coefficient you want to use, press OK briefly
Active factor correction during measurements
When you observe, during measurements from speed sensors, a constant difference between the tripmeter readings and the road book, this difference may result from imprecise calibration. You can quickly correct the value of the active calibration factor.
- press the CAL button twice briefly
- in the top line you will see the active calibration factor flashing
- press the arrows to change its value
- then press OK briefly or leave flashing to accept
Hint. Decreasing the coefficient value causes the tripmeter to calculate more distance, increasing it causes the tripmeter to calculate less distance.
GPS-based auto-calibration function *
In the H-100 tripmeter, it is possible to auto-calibrate the calibration factor for speed sensors based on GPS. Such calibration must be performed when you are driving faster than 30 km/h and the GPS signal is based on at least 5 satellites. You will need a road section of at least 1,500 m.
When stopping, have your tripmeter ready:
- Press MENU long to bring the tripmeter to the start screen position.
When you see the start screen [ _ _ _ _ ] skip this point - long press the MENU button until the main branch of the tripmeter menu appears
- use the arrows to find the Tripmeter Settings screen and press OK
- use the arrows to select the Measurement/auto menu and then press OK
When using Multik mode, before starting calibration, select the coefficient you want to auto-calibrate.
and then accelerate the vehicle and:
- press the RUN button (you will see the word Auto-calibration)
- drive 1 km to complete calibration